
Stars Blinker is aimed to anyone takes Deep-Sky pictures. The app allows to compare two images of the same area taken at different times, with the same or different instruments. Changes, are highlighted by the blinking of any object (star, asteroid, etc.) that only appears in one of the images or has changed position or brightness between a shot and the next.
After shooting pictures of stars clusters, nebulae, galaxies and so on, often you would check if there are changes compared to the “normal" appearance of the photographed area. To
do it, usually you have to search for a picture (or map) of the same
area and check brightness and location of each object.
Unless you have a blink comparator, that, alternating the vision of two shots obtained at different times, allows to detect and highlight changes or transient phenomena (like comets, variable stars, novae and supernovae, asteroids etc.).
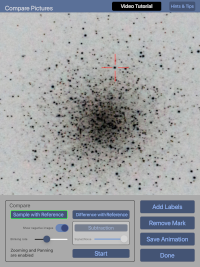
With Stars Blinker two pictures of the same area, a sample and a reference, are shown alternately after being loaded and aligned. If an object is present in only one of the pictures, it blinks and can be easily found and marked. Instead, if an object has changed position between two consecutive shots, during the animation it bounces back and forth, showing the path traveled.
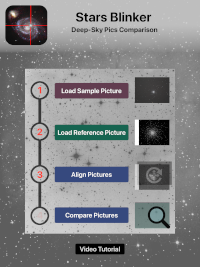
Steps to make a blink animation:
-
Load two pictures, a Sample and a Reference, from the local Photo Gallery or from iCloud. The Sample image is the picture that you want to check. The Reference can be any picture of the same area.
-
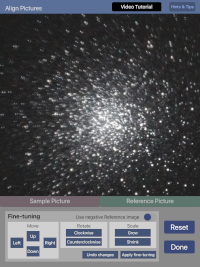
Align the two images: just mark the same three stars on each picture and press a button: the sample image is rotated, resized and moved to overlap the reference picture.
-
Start blinking pictures.
With Stars Blinker you can also:
-
use images taken with different instruments (I.e. comparing your picture with snapshots taken from online maps and catalogues);
-
manually refine alignment;
-
adjust blinking time interval;
-
invert colors to compare pictures in negative;
-
zoom and pan the animation to frame a specific area or to examine in detail the images;
- subtract Reference image from Sample to highlight any changes;
- insert a mark to highlight the position of a Transient;
- add labels to report subject, date and time of shooting etc.;
- save animations as short movies in your local Photo Gallery.